Show Posts

This section allows you to view all posts made by this member. Note that you can only see posts made in areas you currently have access to.


Topics - Gimamam

Pages: [1]
1
Raider Essentials / Reminders for Raiding. Please read.
« on: August 10, 2016, 03:10:33 AM »
With the lucrative rewards that come from the Vanquisher Raid Achievements the last several expansions, FL Raid team has worked on them when time and effort present themselves. These achievements unlock purchases on vendors, present you with special titles, present you with gear, and present you with some of the more powerful augmentations not available anywhere else in the game.

These achievements take a coordinated effort that includes all 54 of the people on the raid.  So you following instructions, following position announcements, following emotes/GINA triggers, following MA, and watching the pertinent channels you belong to are required.  Below is some reminders of basic behaviors that you should, by level 105 and 3/4 of an expac in, already know and be constantly doing as second nature in a raid.

I am more than well aware of real life commitments, lag, being tired, playing while intoxicated, among other things.  I will not sit here high and mighty and pretend that I myself haven't been one of the items on that list. You are able to raid with FL Raid team for up to 9 hours a week. That is only 5.4% of your week. We ask only that you bring your A+ game and intention to play your role to the best ability to meet the goals of the team.

I understand as well, that we all raid for our own reasons - to see content, to get better gear, to win the hard mode, etc. However, for too long now, too many people have been coasting. We have seen people lax in following MA calls to boost their DPS numbers on the wrong mob, ignoring instructions because they 'know' better, yelling louder than the next guy to get people to follow them, failing to ask questions when uncertain, etc.  FL is led by Furro. Strats are learned from experiencing the event and adjusting. Sideline coaching will be a quick way to get yourself benched. This does not preclude you from offering ideas in channels and on the boards - but telling FL that XYZ guild does it this way...

Adjusting raids on the fly and post event is part of the FL raiding experience. Adjusts are usually posted within the next week to the FL Forums event strat post.  Forums should be visited more than 1 time an expansion.  You should be here checking up periodically on new and exciting ways of the FL raid experience.  To be able to see full posting (pictures, links, etc) you should be registered on the board and logged in - this takes 2s.

DPS parses are posted frequently by FLBOT, or by individuals from within the raid team.  While there is a measure of competition that is present and somewhat desired by some individuals of the raid team, the goal overall is to defeat the event in a timely and low death fashion.  If you have to lower your dps to move out of some bad shit so that the cleric doesn't have to heal you and let a tank die, this is something you do.

On the whole, you are expected to do the most DPS you can do.  The aforementioned DPS parses being posted is to increase awareness of your fellow class members who are pulling out more dps and give you the opportunity to learn from them.  On these boards, there are MANY posts on how to increase your DPS.  Read them and learn. If you are shy, speak to one of the leads who can help you speak to another of your class for tips.

One key point that doesn't seem to get across as often as it needs to for this to happen - Always Be Casting - ABC. If you have spells and your little blue bar isn't being used, you are not doing enough to increase DPS. If you have AAs or activated discs/abilities that aren't on cooldown during a fight, make use of them.  Find your class type websites that still exist, find the eq forums, and use them to learn what discs/abilities/adps stacks for your use.

There are options available in your settings to help decrease your lag, Even Furro plays on a machine so old it's almost legal to vote.  Several posts can be found to help you with this. One such is Scornfire's lag reduction guide: http://www.daguild.org/phpBB3/viewtopic.php?f=2&t=8823

GINA is not optional.  This is a powerful tool to help you avoid bad emotes, help remind you to keep your abilities on cooldown with timers/announcements, and to assist in bettering your burns with notifications from ADPS abilities landing on you.  There are trigger packages available from the individual event posts.  At minimum, you need these triggers.  There is nothing stopping you from altering the triggers to fit your needs, or creating new triggers for your own personal use or to share.  You should know the events past and present via these boards at the very least and not failing emotes.

All classes should have the ability to shrink themselves. This is basic Raiding 101. This is not optional.

Here is a list with links to all/all shrink devices:

http://lucy.allakhazam.com/item.html?id=96480 - Philter of the Ant - Alchemy
http://lucy.allakhazam.com/item.html?id=28906 - Bracelet of the Shadow Hive - Vex Thal
http://lucy.allakhazam.com/item.html?id=110796 - Demagnifying Glass - Convorteum
http://lucy.allakhazam.com/item.html?id=96481 - Mist of the Ant - Alchemy
http://lucy.allakhazam.com/item.html?id=19725 - Wand of Imperceptibility - The Deep
http://lucy.allakhazam.com/item.html?id=9176 - Anizok's Minimizing Device - Tinkering
http://lucy.allakhazam.com/item.html?id=86735 - Earring of Diminutiveness - DoD quest 68.4
http://lucy.allakhazam.com/item.html?id=101362 - Humanoid Reductionizer - Mech Guardian
http://lucy.allakhazam.com/item.html?id=67098 - Ring of the Ancients - 13th Anniversary quest
http://lucy.allakhazam.com/item.html?id=62433 - Shimmering Bauble of Trickery - PoMischief
http://lucy.allakhazam.com/item.html?id=28727 - Vial of Shrieker Essence - Fungus Grove

I suggest you invest some time to get one for use.

Any and all shaman that raid, should have the rank 2 of the Shrink AA.  You may be called upon to shrink people in some events that require 54 people to fit in a tight space.

Playing in third person can and does help when you are shrunk, learn to play in third person on the short term for raids if needed.

There are spells that alter your form that get cast mid fights.  The illusion portion of these spells needs to be put on the block list.  Your increased size is a detriment to the raid.  Events do call for people to squeeze into a tight space, and you being big can prevent people from fitting.

Here is a short list that is incomplete - add yours to this thread as they appear.

http://www.raidloot.com/Spells.aspx?name=16443 - Group Bestial Alignment Form - /blockspell add me 16443
http://www.raidloot.com/Spells.aspx?name=16442 - Group Guardian of the Forest Form - /blockspell add me 16442
http://www.raidloot.com/Spells.aspx?name=30710 - Visage of Death Form - /blockspell add me 30710
http://www.raidloot.com/Spells.aspx?name=30708 - Group Pact of the Wolf Form - /blockspell add me 30708
http://www.raidloot.com/Spells.aspx?name=41142 - Visage of Decay Form - /blockspell add me 41142
http://www.raidloot.com/Spells.aspx?name=49288 - Night's Terror - /blockspell add me 49288
http://www.raidloot.com/Spells.aspx?name=21685 - Form of the White Wolf - /blockspell add me 21685
http://www.raidloot.com/Spells.aspx?name=21684 - Form of the Black Wolf - /blockspell add me 21684

We are getting to the point where winning the raid sloppily is not enough. If you want to see the Vanquisher achievements finished out, you need to step up and be better. Attempts that are failed will start resulting in a "die please" call so we can start over and do it right.

It is expected that you ask questions. If you are assigned to a role you are uncertain of, speak up. If you fail emotes, fail to pick up your assigned mob, fail to do any myriad of things that you were assigned to and the raid wipes - you have wasted 53 other peoples' time.

2
Shadow Knight / Shadowknight aggro spells
« on: August 06, 2016, 08:31:08 AM »
Highlighting the tools available at level 105 as of The Broken Mirror Expac.

Impose for power line:
http://www.raidloot.com/Spells.aspx?name=43619
http://www.raidloot.com/Spells.aspx?name=43620
http://www.raidloot.com/Spells.aspx?name=43621
This spell puts a hate over time on a single target for up to 42s (server tick rounding may put it up to 5s longer) 30s base + 6s type 3 + 6s AA Extended Provocation for Power

Terror of Narus line:
http://www.raidloot.com/Spells.aspx?name=43607
http://www.raidloot.com/Spells.aspx?name=43608
http://www.raidloot.com/Spells.aspx?name=43609
This spell is straight aggro, hate applied to the target.

Terror of Poira line:
http://www.raidloot.com/Spells.aspx?name=34687
http://www.raidloot.com/Spells.aspx?name=34688
http://www.raidloot.com/Spells.aspx?name=34689
Same as Narus, previous upgrade to the spell - 5 levels lower

Disgust:
http://www.raidloot.com/Spells.aspx?name=43673
http://www.raidloot.com/Spells.aspx?name=43674
http://www.raidloot.com/Spells.aspx?name=43675
This spell is a PBAE spell that generates straight aggro for the SK. Unlimited targets.  It does not share a timer with the other AE spells, so you can have up Disgust, Repugnance, Abhorrence, Loathing, Burst of spite, Revile, Vilify and Dread Gaze and continuously cast AE hate.

Deceitful Deflection:
http://www.raidloot.com/Spells.aspx?name=43640
http://www.raidloot.com/Spells.aspx?name=43641
http://www.raidloot.com/Spells.aspx?name=43642
This spell is a PBAE spell that generates hate, does damage, and heals you. Unlimited targets.  Shares a timer with the level 98 version.  Can crit, can benefit from Carmine blade bonus spell damage, does not benefit from focuses.

Distasteful Bargain:
http://www.raidloot.com/Spells.aspx?name=43685
http://www.raidloot.com/Spells.aspx?name=43686
http://www.raidloot.com/Spells.aspx?name=43687
This spell is a PBAE spell that generate hate and does damage. Unlimited targets. Shares a timer with the level 99 version AND the Spear line. Do not use if spear is preferred for damage. Can crit, can benefit from carmine blade bonus spell damage, does not benefit from focuses.

Veil of Darkness:
http://www.raidloot.com/Spells.aspx?name=41815
http://www.raidloot.com/Spells.aspx?name=48702
AA - This will apply Hate to you, and a debuff on the mob that makes them miss quite a bit more for that short duration.

Stream of Hatred:
http://www.raidloot.com/Spells.aspx?name=41126
http://www.raidloot.com/Spells.aspx?name=48697
http://www.raidloot.com/Spells.aspx?name=48698
AA - Cone AE - This will hit up to 8 targets in front of you with hatred for you.

Explosion of Spite:
http://www.raidloot.com/Spells.aspx?name=27559
http://www.raidloot.com/Spells.aspx?name=38183
http://www.raidloot.com/Spells.aspx?name=48695
http://www.raidloot.com/Spells.aspx?name=48696
AA - PBAE - This will hit up to 8 targets that are standing next to you with hatred for you.

Explosion of Hatred:
http://www.raidloot.com/Spells.aspx?name=16100
http://www.raidloot.com/Spells.aspx?name=23572
http://www.raidloot.com/Spells.aspx?name=38184
http://www.raidloot.com/Spells.aspx?name=48731
http://www.raidloot.com/Spells.aspx?name=48732
AA - Targeted AE - This will hit up to 8 targets that are around your target with hatred for you.

Projection of Doom:
http://www.raidloot.com/Spells.aspx?name=21786
http://www.raidloot.com/Spells.aspx?name=23539
http://www.raidloot.com/Spells.aspx?name=48692
AA - Single Target - This will summon a pet that will attack your target generating Hate in large amounts - when the pet despawns it transfers that hate to you.

Hate's Attraction:
http://www.raidloot.com/Spells.aspx?name=hate%27s+attraction
AA - Single Target - This will generate a large amount of hate and if the mob is lower level than you, will fling them to your position.  Mobs even or higher will generate the hate, but they will be immune to the fling.

Ageless Enmity:
http://www.raidloot.com/Spells.aspx?name=ageless+enmity
AA - Single Target - This is a 100% success rate taunt. This will make you the top aggro, and put you 6000 points of hate (rank 4) above the previously most hated target.  This is a true taunt.

Mindless Hatred:
http://www.raidloot.com/Spells.aspx?name=Mindless+hatred
AA - Single Target - This is not a taunt. This will only force the mob to attack you for a short time. If you intend to keep the mob beyond the time limits of this spell, you will need to use a true taunt to make yourself top aggro, or use other aggro abilities to overcome the aggro of the previous most hated target.

Unflinching Acrimony:
http://www.raidloot.com/Spells.aspx?name=unflinching+acrimony
Disc - Single Target - This is not a taunt. This will only force the mob to attack you for a short time.  If you intend to keep the mob beyond the time limits of this spell, you will need to use a true taunt to make yourself top aggro, or use other aggro abilities to overcome the aggro of the previous most hated target.

Harm Touch:
http://www.raidloot.com/Spells.aspx?name=48691
AA - Single Target - While not a taunt or a hate generating spell specifically - this aa will give you a large amount of aggro.

And lastly - Taunt:
This is the skill you can find under the skills button on your inventory page. Create a hotkey and keep it handy.

If you are an SK and assigned to pick up and tank a mob, you should always be casting. Cast more hate spells, cast more damage spells.  Cast, Cast, Cast.  Your lifetaps cause more hate due to damage done. Your spears are great aggro. Your terrors should remain on cooldown while tanking.  Impose should be continuously ticking on the mob.

My specific hotkey for tank swap pickups:
/alt activate 10392     <- Ageless Enmity
/alt activate 822         <- explosion of hatred
/alt activate 749         <- explosion of spite
/cast 2                       <- Top level terror
/alt activate 9400       <- Hate's Attraction

All the above is instant cast.  The result would be a true taunt and +6000, +12000, +12000, +13410, +18000 = 61410 hate generated by the abilities alone.  That is before the + hate mod from your mask, and the + hate mod from bold attacks and the + hate mod from VoT/holmein if you have it up.

The above can be followed by Projection of doom and veil of darkness for another large chunk of hate.


Please read up and understand what your taunt/hate generating spells do so you can succeed at getting a mob and holding it.

3
Raider Essentials / Targeting, ETW, and YOU!
« on: July 30, 2016, 04:14:35 AM »
This is information taken from a previous post made on the subject. It is a little dated as there are now 13 slots for the ETW, but the quality of information remains the same.

With the advent of the Extended Target Window (known as ETW for short), knowing what is mad at you and ease of targeting mobs has become easier.

Going to cover some info on mob targeting and how to make raiding easier for you.

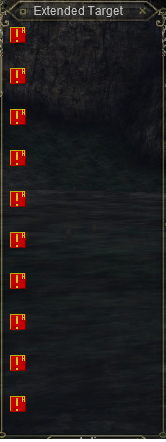
Here is your basic ETW window. No mobs are aggro and no targets are specifically set in the window:


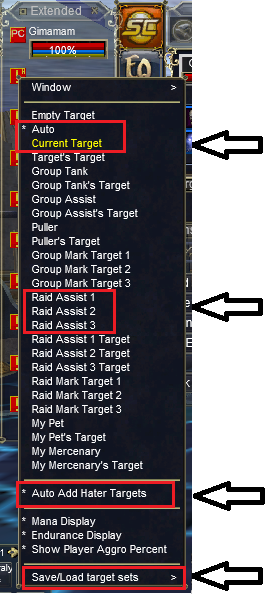
Here is the menu for the ETW when you right click on a line within the ETW:


Note the red boxes and the arrows. These are important items to take note of. For most people who have not changed the settings, default for all 10 ETW slots should be "Auto" and "Auto Add Hater Targets" When a new target becomes aggro on you, your group, or your raid, it will be automatically added to the next available slot from the top. Everyone in the raid who is set on auto - will have the exact same order of mob placement on the ETW.
examples:


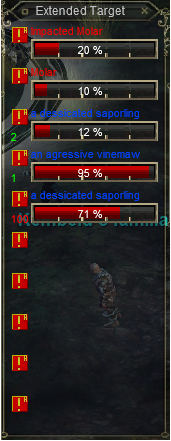
The first red box highlights that auto is set by the asterisk, but also shows the 'current target' option. If you have a target currently selected and you click the current target option - that target will appear on your ETW in the slot that you have selected. Note that is what I did to get Gimamam on the first ETW slot. Shown in this shot is putting Bdallya on the ETW in similar fashion:


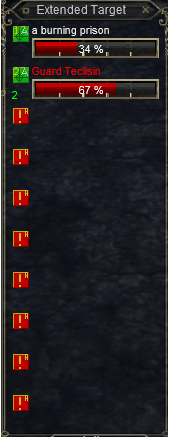
The next red box highlights the 'raid assist' targets 1-3. In a raid, the raid leader can designate up to 3 assists. If you set a line of your ETW to one of these target types, it will no longer show automatically what is mad at you, but only the target of the specific assist. An example:


I have 2 raid assist targets loaded here. in the first slot is raid assist 1. You can see that with the "1" and "A" on the green box next to the target. The same with raid assist 2 on the second line.

The last red box is the load/save feature. If you find yourself constantly loading the same specific targets to lines you like to have them on (for example: healers constantly healing the same tanks in a raid) you can save the ETW set very similarly to saving a spell set and reload it at any point in the future.

--------------------------------------------------------
Now, on to other targeting specifics.

The game has a command "/target" or "/tar" for short. This command will target the nearest NPC/PC that fits the name, or return a chat line "I don't see anyone by that name around here..."

examples of usage:
/target gimamam
/tar gimamam
/tar gim
/tar g

The more specific you are in the line, the better the results on getting the specific target you want. The first two are very specific and will result in targetting me. The third will also pick up anyone whose name starts with 'gim' if they are closer to you. The last example is very generic and will pick up the closest mob/PC that starts with the letter g. This illustrates targetting PC's.

Targeting NPC's is a bit different. Every mob in the game spawns with a number on its name. If you have only 1 mob named "Generic NPC" in the zone and you need to use the /target command, its full name will be "Generic_NPC00" Note that the space in its name now has a underscore character, and it has a number on its name. Mobs will always start their numbers with 00 and increment up from there. Two Generic NPC mobs in a zone would be fully named as "Generic_NPC00" and "Generic_NPC01" Usage of the /target command in this case would be:

/target generic_npc00
/tar generic_npc01
/tar generic
/tar g

First two again are very specific and will give you only that mob if its nearby. the third will target whichever "generic npc" is closest and the last will target the closest generic npc or a toon with a name that starts with "g".

This is important for fights that you will be assigned a specific target that will be spawning as a specific time. A tank that is spamming their /target generic_npc01 key will be able to pick up their target much faster than waiting for it to be on ETW wrecking some poor caster.

Now, for targeting people who are requesting buffs. If someone /tells you and you want to target them, instead of looking in the raid window for their name, you can to a /rtarget (/rtar for short). Basically, a reply target. You are targeting the last person to send you a tell, for quick easy easy way to target them, buff them, and get back to what you were doing.

For more ETW functionality, here are a few more commands to make your targeting needs easier.

usage
/xtar set # <mob name>
ex: /xtar set 3 a_doomscale_arcanist00
function
This command would set the ETW slot "#" with a mob/PC named "<mob name>". In the example, it would set ETW slot 3 to the first a doomscale arcanist that was to spawn.

usage
/xtar #
ex: /xtar 3
function
This command would target the ETW slot that you specify. In the example, you'd target whatever was in ETW slot 3

For fights which have multiple phases, or different mob priorities, you can make a singular hotkey for that purpose. for example. a single hotkey that would contain 2 separate lines in one hotkey:

/tar a_doomscale_warden00
/tar a_fallen_warden00

This would attempt to target the doomscale warden first, and then the fallen warden.
If there was not a doomscale warden up, it would attempt to target the fallen warden. if neither was up, there would be no target to obtain.
If there was a doomscale up, but no fallen, it would target and stop at the doomscale.
If there was no doomscale but there was a fallen, it would target the fallen
If there was both a doomscale and a fallen up, it would target the doomscale very briefly, and stop on the fallen.

For this purpose - you would need to put the mob with the highest priority as the last line of the hotkey as that is where the targeting would stop.


This can be a work in progress, there is always something to learn. If there is any questions, post and ask!

4
Shadow Knight / Sk's can't tank.... defensives by the numbers.
« on: March 07, 2016, 04:40:12 AM »
Knight Defensives.

Recently there are a few changes that went into effect that gave knights the Defensive Proficiency that Warriors had.  Now this wasn’t a popular decision within the Warrior ranks, and while I agree that the knights as a group needed SOMETHING to help out, we didn’t need a direct copy/paste of the warrior abilities.  That is too powerful considering the stacking abilities of ‘Vie’ type effects.  This post isn’t about arguing the right/wrong of what DBG did.  This post is about talking how the math and the abilities work as a whole.

There is a good write-up of how AC, Damage Bonus, Damage Interval, and how mitigation works done by Tearsin on the DBG boards: https://forums.daybreakgames.com/eq/index.php?threads/repository-of-essential-eq-mechanics-knowledge.205390/
Some of this post will use information from there, and from other searchable sources as well as everything personally tested for numbers.

Assuming all abilities are at rank 3 or fully purchased AA.

Mitigation abilities:
Knights Sedulity – 5% innate mitigation.

Defensive Proficiency – granted by Weapon Stances AA. – 30% mitigation.

Unholy Guardian (paladin version – Holy Guardian) – 36% mitigation.  Timer 16. 2 minute duration, non extendable.

Vie/Absorb abilities:
Doomscale Mantle – 35% absorb of incoming melee damage, max 1,214,845 damage. Fades after 1 min duration base. Timer 4 extendable to 1m45s.

Impudent Influence – 20% absorb of incoming melee damage, max 531,678 damage, defensive proc of a lifetap, increase of a small amount of AC. Fades after 2 min duration base or 48 counters of the lifetap/heal fired. Timer 10 extendable to 3m24s

Vizat’s Carapace – 20% absorb of incoming melee damage, max 575,174 damage, defensive proc of a lifetap, increase of a small amount of AC. Fades after 2 min duration base or 32 counters of the lifetap fired. Timer 10 extendable to 3m24s

Repel – 90% absorb of incoming melee damage, max 35592 or 3 charges (6 with AA – Enduring Reproval)

Vizat’s Skin – Self buff defensive proc – 100% absorb of incoming melee damage, max 5613, 3 charges per proc.

Cascading Theft of Defense – AA proc off of terrors – 100% absorb of incoming melee damage, max 4600 per hit, 5 charges per proc, max total absorb is 34000. (doesn’t make sense since 5x4600 = 23000, won’t hit max)

Don’t think this counts as a vie, but I couldn’t find a mob that would hit over 25k reliably to test it in a non raid environment to see stacking.  I am looking for a good way to test this better.
Reaver’s Bargain – Consumes 750 endurance per second to allow you to absorb 1% of incoming melee damage with your mana, and protects against 75% of damage over 25,000 per strike up to 1,500,000 total damage, and increases your unconscious health by 50,000 points for 2.5 min.  Once started the Reaver’s Bargain cannot be ended early and should your mana or endurance drop below 20% you will be overcome with Reaver’s Exhaustion which ends the bargain and drains your remaining mana and endurance.

Outside Buffs usually in the form of Vie/absorb type abilities:

Shining Bastion – 10% absorb, cleric spell.
Greater Ward of Vie – 10% absorb, cleric spell.
Aura of the Reverent – 4% absorb, max 1278, cleric spell.


Right now, the Two knight mitigation abilities DO stack and work concurrently with each other.  This gives a reduction of 35% off of the DAMAGE INTERVAL (DI) that is part of any mob’s hit.  Shielding as referenced in the post above is a reduction in a mob’s DAMAGE BONUS (DB) that is part of their hits.  Currently this is capped on gear at 35%.
Damage as far as I can tell from testing is reduced by mitigation first, and then by absorb values.

So you end up with a formula that looks like:
(DB*(1-Shielding/100))+(1-Mitigation/100)*DI*(1-20))*(1-Absorb/100) = Final hit.

Unholy/Holy Guardian mitigation disc does not stack with the Stance AA, but it does stack with the Knight’s Sedulity AA, ultimately producing a 41% reduction to the DI value of the mobs hit table.

Knight Absorb abilities/discs do not stack with each other, but will stack with the mitigation abilities.  You can have multiple of them up on you at a time, but they will not stack to give you a lower hit.  They fire in order of highest percent blocked by the spell/ability, not by the total amount blocked.

Vizat’s skin (100% - 5613 hit)> Cascading Theft of Defense (100% - 4600 hit) > Repel  (90%)> Mantle (35%) > Carapace/Impudent (20%)> SB/Vie (10%) > Aura of the Reverent (4%)

This is the order that abilities would fire if multiple are up on the same person.  And only 1 of these abilities would reduce the damage on a hit at a time.  With this in mind – you would want to be sure to max out the absorb values for the incoming damage you are taking.

So, this leads to issues if the mobs damage output per hit is high. 

Ex. On a mob that is hitting for 9k after mitigation, the Vizat’s skin, Cascading Theft of Defense and Repel would reduce the overall individual hit further than what the other abilities would. Skin:  9000-5613 = 3387, Cascading:  9000-4600 = 4400, Repel:  9000-(9000*.9)=900 Where with Mantle: 9000-(9000*.35)=5850, Carapace: 9000-(9000*.2)=7200, SB: 9000-(9000*.1)=8100

You can see that the hits are far lower when not relying solely on the activated percentage reducing discs vs a hard capped specific damage reduction.

But instead, let’s have the mob hitting for 20k. Skin: 20000-5613 = 14387, Cascading: 20000-4600 = 15400, Repel: 20000-(20000*.9)=2000 Mantle: 20000-(20000*.35)=13000, Carapace: 20000-(20000*.2)=16000, SB: 20000-(20000*.1)=18000

Your damage incoming isn’t as spread as wide now.

And now, let’s have the mob hitting for 50k. Skin: 50000-5613 = 44387, Cascading: 50000-4600 = 45400, Repel: 50000-(50000*.9)(subject to hit cap of 35592 now)=14408 Mantle: 50000-(50000*.35)=32500, Carapace: 50000-(50000*.2)=40000, SB: 50000-(50000*.1)=45000

Skin becomes a detriment at an extra 11887 per hit over mantle. If a mob is hitting you and uses all three charges on skin for a series of hits – that’s a potential 35661 damage that could have been avoided. And 5 charges on Cascading could net you an extra 64500 damage over mantle alone (12900 per hit).

This leads to having a desire/need to not use Skin or Cascading during raids/group situations where the per hit cap would be more detrimental than helpful if Mantle/Carapace are needing to be used. You can choose to not use Skin on your own as it is a self buff spell that you have to cast.  However, you would have to block Cascading theft of defense via the /blockspell command. 
/blockspell add me 16101 should add it to the blocked list
/blockspell remove me 16101 should remove it from the blocked list. 

But this is really only needed for mobs that the per hit reduction of the caps on skin and cascading are less than the per hit reductions made by mantle and carapace.

Repel is the odd duck out – since it has such a high limit, odds are that in a group setting, the limit is not going to get reached until the 3rd or successive hits.  Whereas, on a raid, that limit could be reached or almost reached in the first hit causing the buff to fade on a partial absorb on the second incoming damage hit.  The larger cap on it makes it still worthwhile to use even with mantle/carapace running.  Your personal mileage may vary and you may choose not to use this to prevent a larger spike of damage on the second or third incoming hits while opting to have a smoother distribution from just the absorbs from mantle/carapace.

Below are some numbers from actual mob interactions. Standing there and letting a mob beat on me for a good duration to make sure to record the 20 individual damage hits that they were capable of.  The first column is a toon that does not have Knight’s Sedulity, the second is with just Knight’s Sedulity (effectively DI-1), and the third is Knight’s Sedulity+DP (effectively DI-7). But to figure the true DI value, take the max hit, subtract the DB and divide by twenty. Play with the rounding cuz Sony liked rounding and you have a DI of roughly 566 (566.55). This mob is seemingly endowed with a 1969 DB after shielding (3029 or so without shielding).

Mob was a Senshali shadowblade in PoShadow.

   Non-Sedulity   DI      Sedulity Only   DI      Sedulity + DP   DI
   13300           566      12734           539      9334           368
   12734           567      12195           537      8966           368
   12167           567      11658           539      8598           369
   11600           566      11119           538      8229           368
   11034           567      10581           538      7861           368
   10467           567      10043           539      7493           369
    9900            566       9504            538      7124           368
    9334            567       8966            538      6756           368
    8767            566       8428            538      6388           368
    8201            567       7890            539      6020           369
    7634            567       7351            538      5651           368
    7067            566       6813            538      5283           368
    6501            567       6275            539      4915           369
    5934            566       5736            538      4546           368
    5368            567       5198            538      4178           368
    4801            567       4660            539      3810           369
    4234            566       4121            538      3441           368
    3668            567       3583            538      3073           368
    3101            566       3045            538      2705           368
    2535                         2507                        2337   
                        
DB    1969      DB           1969      DB           1969   

The numbers in the DI column are off due to rounding (Sony math!), but you can see that for each, the percentage reduction is present:  538.25/566.55 = 95.00% Effectively 5% reduction in DI with Sedulity. And 368.25/566.55 = 64.99% Effectively 35% reduction in DI with Sedulity + DP. (proving they stack)

This needs to be pointed out that % mitigation abilities are NOT taking 35% off the final hits, but 35% off of only the DI portion of the hits – remember the formula above.

Warriors with their innate 5% and running Last Stand will end up with a 50% reduction in the DI value.  The resultant DI on the mob listed above would be 566.55*.5 = 283.275 and their max hit would be 7634 (rounding errors again, but think effectively 10 DI values off the original hits). You can look at this then as 7634/13300 = 57.39% of the full hit, but do not mistake that you are receiving the full 50% off the DI.

Given the above, you can plug some numbers into the formula given early to find some per hit damages.
(DB*(1-Shielding/100)+(1-Mitigation/100)*DI*(1-20))*(1-Absorb/100) = Final hit.

For the max hit without mitigation:
(1969+(1*566.55*20))*1 = 13300

For the min hit without mitigation:
(1969+(1*566.55*1))*1 = 2535.55 (2535 actual hit)

From these you can find what your max hits would be with Sedulity, DP and Unholy/Holy Guardian.

Sedulity:
(1969+(.95*566.55*20))*1 = 12733 (12734 actual hit)

Sedulity + DP:
(1969+(.65*566.55*20))*1 = 9334.15 (9334 actual hit)

Sedulity + Unholy/Holy Guardian:
(1969+(.59*566.55*20))*1 = 8654.29 (8654 actual hit)


Moving on to include some of the absorb discs:

KS + DP + Mantle:
(1969+(.65*566.55*20))*.65 = 6067.1975 (6068 actual hit)

KS + DP + Carapace/Impudent:
(1969+(.65*566.55*20))*.8 = 7467.32 (7468 actual hit)

Blah Blah Blah, you get the idea at this point. Below are some more tested numbers with specific abilities.
DP: Defensive Proficiency
KS: Knight’s Sedulity
VC: Vizat’s Carapace/Impudent Influence (both same percentage.)
UG: Unholy Guardian
SB: Shining Bastion/Vie (both same percentage.)
AR: Aura of the Reverent
CD: Cascading Theft of Defense
Skin: Vizat’s Skin

Non tank   13300   11970 with vie
      
No DP                      12734   
DP Alone                   9334   
DP + DM                   6068   
DP + VC                    7468   
DP + SB                    8401   
DP + Vie                    8401   
DP + SB+Vie             8401   
DP + UG                    8654   
DP + Repel                  934   
DP + Skin                    3721   = 9334-5613
DP + Repel+Skin       3721   (showing the precedence of Skin over Repel percentages)
DM Alone                   8278   
DM + SB                    8278   (showing the precedence of Mantle over SB percentages)
DM + Repel                1274   (showing the precedence of Repel over DM percentages)
DM + Skin                  7121   
VC Alone                   10188   
VC + SB                   10188   
VC + Repel                1274   
VC + skin                   7121   (showing the precedence of Skin over VC percentages)
UG Alone                   8654   
UG + SB                   7789   
UG + Repel                 866   
UG + Skin                 3041   
AR Alone                   12225   
AR +DP                     8961   
AR+DP+VC               7468   (showing the precedence of VC over Aura percentages)
AR + VC                   10188   (showing the precedence of VC over Aura percentages)
Skin Alone                  7121   
Skin + Aura                7121   
Skin + SB                   7121   
SB alone                   11461   
Vie alone                   11461   
SB+Vie                   11461   
Skin + Repel           7121   (showing the precedence of Skin over Repel percentages)
CD + DP                   4734   
Skin + CD + DP          3721   (showing the precedence of Skin over Cascading defense)

Below are a couple of options given the extendable nature of the Mantle and Carapace/Impudent abilities for long duration tanking in a pinch. Also, due to counters and damage limits, Mantle and Carapace/Impudent might not last full duration.  Expect Bargain to not last full duration unless you can pick up some endurance. Expect to use Thought Leech as soon as Bargain fades or you are potentially at 0 mana/end. (side note – I labeled duration wrong on Bargain and didn’t realize till after pictures were done. 2.5 min instead of 2 min. Didn’t feel like recreating pictures.) Roughly 13-15 minutes if we needed it.


5
Shadow Knight / SK's can't add! - spells by the numbers
« on: February 29, 2016, 04:32:25 PM »
I was bored, and curious, and a little OCD. So I started working on how spells worked for the SK class.  There are tons of abilities that add to spells, from multitudes of classes, but below is built around only using what the SK has on hand to figure out how things stack together.  Information pulled from various places and refined to pull in correct information (class forums, dbg forums, and everything was tested in the guild hall by me).  Attached is a spreadsheet with spell number info.

Start with acronyms and short names:
DD – Direct Damage spell
DoT – Damage over Time spell
SP – spell damage mod2 (found on the right column of most armor pieces/found in the stats window tab of the inventory window.)  SP is only useful for the last 10 levels of spells. At 105 this means that your level 95 spells no longer benefit from it.
X – Used below in the formulas as the end result of what actually gets added into the spell based on the spell damage wonky formula. X*SP cannot exceed the base damage of the spell, and at that point will only add as much as the base damage to the spell.
Quote
Spell Damage also uses a wonky formula:
Using a float value "x"
1) Find which is higher Refresh Time or Recast Time.
2) Add whichever is higher from 1) to the Cast Time of the spell to get the Total Cast Time
3) Use one of 3 formulas to find x:
   a) If total cast time < 2.5 Then x = 0.25
   b) If total cast time > 2.5 And < 7 Then x = 0.167 * (totalcasttime - 1)
   c) If total cast time >= 7 then x = 1 * totalcasttime / 7
4) Multiply your worn spell damage by x
5) Truncate the result

“Gift” line of lifetaps – Touch of Holmein, Touch of Klonda, Touch of Piqiorn, Touch of Iglum, Touch of Lanys.
TotC – Touch of the Curse innate proc aa (lifetap). Listed with a total cast time of 45s (used below).
Shroud – Self buff proc lifetap DD. Shroud of the Doomscale, Shroud of the Darksworn, Shroud of the Shadeborne, Shroud of the Plagueborne.
Horror – Self buff proc lifetap off melee damage. Vizat’s Horror, Grelleth’s Horror, Sholothian Horror, Amygdalan Horror.
Dread – Self buff proc returns mana. Mental Dread, Mental Terror.
HT – Harm Touch - Instant Large DD with DoT secondary damage. Large amount of aggro. 20m reuse with AA.
LT – Leech Touch - Instant lifetap DD, nice 'Oh, shit!' button. 10m reuse with AA.
TL – Thought Leech - Instant Mana/End tap DD, two hits, mana/end recovery button. 18m reuse with AA.
RM – Reinforce Malaise AA double dot damage.
VoD – Visage of Decay AA + 55% spell damage – Only for the purposes of this post on spells – the other VoD  is Visage of Death and is for melee damage (not covered at this time).
“Bite” line of spells – Bonemaw’s Bite, Ralstok’s Bite, Korum’s Bite, Malthiasiss’s Bite, Laarthik’s Bite – DD that does returns health and mana.
UA – Unholy Aura, 100% increase to lifetap damage disc. Only works on lifetaps – no effect on other spells.
“Bond” line of spells – Bond of Bonemaw, Bond of Ralstok, Bond of Korum, Bond of Malthiasiss, Bond of Laarthik. DoT lifetap.
AE – Area of Effect Spell. Hits multiple targets. Distasteful Bargain, Repugnant Bargain, Deceitful Deflection, Insidious Deflection.
VBoC- Vicious Bite of Chaos AA – similar to Bite spells – DD that returns health, mana, and end. Rk. 10 damage = 8000 base. Total cast time 0.
RBoA – Ragged Bite of Agony – Large DD that returns mana. Rk.2 damage = 12895 base. Total cast time 0.
SA – Soul Abrasion AA. Increases damage from lifetap procs from self buffs/aa’s.
Base: base spell damage (used below for formulas)
Type3: type 3 augment damage increases (used below for formulas)
Carmine: disc that adds a buff for 1 minute that adds 2235 damage to spells of level 96-105.
Focus: armor focus to increase spell’s damage.
FS: First Spire of the Reavers - Crit increases (assume rank 4/4 for below)


With maxed out Crit AAs for both DoTs and DDs as of 105/TBM expac, the crit mods for spells are:
DDs: 436% of base on a crit
DoT: 452% of base on a crit
With first spire running (rank 4/4):
DDs: 561% of base on a crit
DoT: 677% of base on a crit

Bond line is not affected by UA.
Bite line is not affected by UA.
Gift line is not affected by UA.
Type3 damage is included into crit calculations.
SP damage is included into crit calculations.
Carmine damage is included into crit calculations.

General/aa
As expected, your AA and proc damage can be affected by your worn SP, and your activated crit modifiers, but they are not influenced by focuses, or by added spell damage (Carmine or aura of the void)
Max touch of the cursed base: 1000
Max soul abrasion mod: +460% lifetap proc increase.
TotC + SA = 1000+4600 = 5600 base proc - 156 SP to max at 6600
Base+SA mod+((45/7)*SP)=6600 max hit.
Shroud + SA = 706+3247=3953 – rk.3 base damage
Base+SA mod+(.25*SP)= Shroud damage
Horror+SA = 443+2037=2480 – rk.3 base damage
Base+SA mod+(.25*SP)= Horror damage
Dread+SA = 404+1858=2262 – rk.3 base damage
Base+SA mod+(.25*SP)= Dread damage
RBoA auto casts when any Bite spell is cast including VBoC aa.  It can crit and uses the DD crit mods. It can twincast.
RBoA+(.25*SP) = RBoA damage
VBoC+(.25*SP) = VBoC damage
Lifetap augments/procs on weapons/roar of the lion:
Proc+(.25*SP) = Proc damage


DD info
UA - adds the base damage of the lifetap to the total again, not affected by the crit. (see below)
VoD - adds the 55% inc to the total, not affected by the crit. (see below)
Dicho - not affected by VoD, UA, only first spire
VoD - does not stack with UA for increase to lifetaps - UA supercedes VoD.
Carmine - full 2235 added and included into crit (see below)
HT,TL,LT not affected by SP, UA, VoD, or Carmine
HT not affected by FS.
TL, LT are affected by FS on a crit.
Most if not all AE's are unaffected by spell damage increase focii on gear

DoT info:
RM/VoD do not stack - RM higher value.
DoTs not affected by UA
Seemingly all mods to dot damage are included in the crit damage. Not separated like DDs.
Carmine 96-105 - base dot time in seconds/6 + 1 for amount of ticks. Then 2235/that number = the addition of damage to the base tick. This is included in the crit calc (see below).
DoTs not affected by SP

Dichotomic Fang has a total cast time of 60s (60 reuse, 0 cast), but the actual damage spell is called Dichotomic Bite – and it has a total cast time of 6s (6 reuse, 0 cast) this is accounted for with the formulas to figure out what SP to add to the damage. Does not receive bonuses for spell focus on gear.
Dicho- Base for each level
45591, 47869, 50265, 52777, 55416, 58188
Damage formula = (base dmg)+(0.167*5*SP)

HT at 26/26 ranks in AA: 500000 DD and 83334 DoT for 7 ticks – these damages are not modified by anything that I’ve found.  Cannot Twincast. Cannot Crit.

LT at 1/1 ranks in AA: base dmg = 900. At 27/27 ranks of Consumption of the Soul + 65000 damage. Total: 65900.  Cannot Twincast that I’ve seen. Can Crit. Crit damage is based on the current crit modifiers you have up. 65900 Base DD, 287324 Crit DD, 369699 Crit DD with FS running.

TL at 7/7 ranks in AA: 162500 DD.  Can Crit, Can Twincast. Crit damage is based on the current crit modifiers you have up. 162500 Base DD, 708500 Crit DD, 871000 Crit DD with FS 3/4 ranks, 911625 Crit DD with FS 4/4 ranks running.  There are two hits to this ability 1 for mana, 1 for endurance. Both can crit as above. If out of endurance – do not use this with the Rest line of discs running – you are capped at the 21-29% endurance of that disc and will waste the hit.

Aura of the void clickie – 125 spell damage added after other mods, after crit calculated, and onto a dot at the rate of 125/ticks+1.
Girdle of the weaponmaster – 500 proc damage added after other mods and after crit calculated.
Banestrike is not affected by any damage mods (disc/aa/SP) and cannot crit.

All equations are supposed to be rounded down to the nearest integer at each step. This seems to create inconsistent rounding errors of 1 or 2 points, but for the most part the numbers work out.

Quick Listing of equations:

DD:
Base+type3+(SP*X)+(Base*(focus/100)) = DD with no buffs up.
((Base+type3+(SP*X))*DD Crit Mod)+ (Base*(focus/100)) = DD Crit with no buffs up.

Base+type3+(SP*X)+(Base*(focus/100))+(Base*0.55) = DD with VoD
((Base+type3+(SP*X))*DD Crit Mod)+ (Base*(focus/100)) +(Base*0.55)  = DD Crit with VoD

Base+type3+(SP*X)+(Base*(focus/100))+Base = Lifetap with UA up
((Base+type3+(SP*X))*DD Crit Mod)+ (Base*(focus/100))+Base = Crit Lifetap with UA up

Base+type3+(SP*X)+2235+(Base*(focus/100)) = DD with Carmine up.
((Base+type3+(SP*X)+2235)*DD Crit Mod)+ (Base*(focus/100)) = DD Crit with Carmine up.

AE DD:
Base+type3+(SP*X) = AE DD with no buffs up.
((Base+type3+(SP*X))*DD Crit Mod) = AE DD Crit with no buffs up.

Proc DD/AA DD:
Base+(SP*X) = Proc/AA damage
((Base+(SP*X))*DD Crit Mod) = Crit Proc/AA damage

DoTs:
Base+(Type3/(ticks+1))+(Base*(focus/100))= DoT with no buffs up.
(Base+(Type3/(ticks+1))+(Base*(focus/100)))*DoT crit mod = DoT Crit with no buffs up.

Base+(Type3/(ticks+1))+(Base*(focus/100))+(Base*.55)= DoT with VoD up.
(Base+(Type3/(ticks+1))+(Base*(focus/100))+(Base*.55))*DoT crit mod = DoT Crit with VoD up.

Base+(Type3/(ticks+1))+(2235/(ticks+1))+(Base*(focus/100)) = DoT with Carmine up
(Base+(Type3/(ticks+1))+(2235/(ticks+1))+(Base*(focus/100)))*DoT crit mod = DoT Crit damage with Carmine up


6
Raider Essentials / Rampage Tanking and Rampage List
« on: December 12, 2015, 06:51:20 PM »
I did not see a previous post directly referencing Rampage information on the FL boards so hope this helps.

Much of this information was taken from a post that was previously hosted on the steelwarriors boards/site. (Definitive guide to RAMPAGE - by Jilaman) While this was written back in PoP/Luclin era, the information is still valid in the most part. In some places as needed to clarification/updates are made at the end. This post will be updated as needed with additions/corrections made by anyone who provides valid info.

Original post:
--------------------------------------------------------------
1. Rampage only hits ONE person at a time.  You will see a lot of folks claiming a Rampaging mob can attack more than one player at a time. They are dead wrong. All rampage that exists today in Luclin and all previous expansions attacks only ONE player, period. This is the second most common misconception about rampage. (There are mobs that AE rampage in PoP, but this was written before PoP)

2. Rampage IS a proc. Rampage procs off of the normal attacks made by the mob you are fighting. If that mob isn't hitting anyone, you won't see any rampage messages. Also, because Rampage is a proc, DEX debuffs and other spells that decrease proc rate can indeed lower the rampage rate. Slows also reduce rampage rate because they reduce the rate of the normal attacks that proc rampage in the first place.

3. Rampage NEVER hits the person who is currently being attacked by the mob. Your main tank will never be taking rampage damage while he has aggro on the rampaging mob.

4. Rampage is a SINGLE attack. The person who is being hit by rampage will be hit by one of the mob's normal hits. This attack can be blocked, dodged, parried, and riposted normally.

5. Rampage DOES have a range, and that range IS different from the mob's normal melee range. This range differs from mob to mob. Some mobs can hit you with their rampage attacks literally no matter where you are in the zone; they have unlimited rampage range. Other mobs have rampage range that is barely larger than their normal attack range. Rampage range usually is larger than melee range.

6. Rampage does NOT follow line of sight rules. For normal attacks, if the mob can't see you, it can't hit you. Rampage works differently, and it will hit you even if you are hiding behind objects. If you are in range, you will be hit.

7. Rampage DOES NOT key off the main hate list. This is the most common misconception about how Rampage works. Any mob that can rampage has TWO hate lists, not one. The mob itself keys off of the main hate list just as every other mob in the game always has. The second hate list is for Rampage, and it works VERY differently from the normal hate list. Understanding how this second hate list works is the key to managing rampaging mobs.

Here are the rules for how the rampage hate list works. These rules determine where the rampage damage goes.

1. The order of the rampage list is based upon the order in which players gain aggro. As soon as you attack the mob, heal someone who is being attacked by the mob, or do anything else that causes the mob to aggro, you will be placed in the next spot on the rampage list.

2. NOTHING will get you off of the Rampage list except for Memwipe. Period. Feign death MAY get you off the rampage list IF you are lucky enough to score a memwipe when you feign, and we all know that's a crapshoot at best. Even death does NOT ALWAYS remove you from the rampage list; many rampaging mobs will start beating on someone who died to rampage the instant they are resurrected. Rumblecrush is notorious for this particular behavior, so plan your battle rezzing with care and make sure you rez the dead outside rampage range.

3. Nothing you do will move you up or down the rampage list. Taunt, evade, jolt, and other methods of controlling aggro such as chain snaring, stunning, hate giving and hate taking spells, as well as all weapons with hate generating procs all have NO EFFECT WHATSOEVER on your position in the rampage list. Chain healing and chain nuking also have absolutely no effect on positions in the rampage list, although they will get you to the top of the main hate list fairly fast.

The list forms in the order the mob aggros people, and it stays in that form, never changing EXCEPT to remove those who have scored memwipes with Feign Death. You CAN clear the list by repeatedly casting memblur and memwipe on the mob you are fighting, BUT remember that this will also clear the main hate list and that can cause all kinds of problems.

Now, things to remember...

Remember, rampage DOES have a range. If you are taking rampage damage and move out of a mob's rampage range, it will start attacking the next person on the rampage list until you move back in range, then it will start beating on you again.

The rampage list is SET IN STONE. This means if you know the order the mob aggroed people, you know exactly the order the rampage attacks will follow. This means you can control it.

If you have Feign Death, and use it, you will NOT take any rampage damage while feigned. When you stand, you will immediately start taking rampage damage again UNLESS you scored a memwipe with Feign Death, in which case you are now at the very bottom of the rampage list. This is, of course, subject to the usual feign death bug... if the mob doesn't buy the feign for whatever reason, you will continue to take rampage damage while Feigned.

Monks usually pull Rampage tank duty, especially if they have Combat Agility 3. The reason for this is that they will get hit by precious few of the rampage attacks due to their unmatched combat avoidance.
The usual strategy...

First, everyone needs to make a hotkey to the effect of "TAKING RAMPAGE DAMAGE NOW" and spam it the instant they start taking rampage damage. Healers need to be ON THE BALL and tracking that message so they can keep whoever it is alive. As long as the person taking rampage damage is alive, in rampage range, and doesn't Feign Death, you have locked rampage attacks down to that single person.

When you engage a rampaging mob, have your main tank get aggro first. Immediately send in all of your Monks and have them attack ONCE only to make sure they get the mob's attention. Note, you MUST make sure your monks attack BEFORE the first heal lands on the tank, or else that healer is going to be the first to take rampage damage and die very quickly. With rooted mobs this is trivially easy to do... just have your main tank hit the mob with an arrow, and then each monk follows suit in exactly the order you want them to take rampage.

Once that is done, engage normally. The monks will spam their enrage hotkeys as they take rampage damage. As long as you have healers keeping up with it, you've got it locked down.

Clerics, this means you have two main tanks to keep alive. If you have both ramp and ma in group it can be helpful to pr ramp tank and stay on ma)
--------------------------------------------------------------

Things to clarify/update:

Fade changed the way people could drop off the Ramp list - with the most recent changes, Fade is not reliable to most classes if they happen to be the next on the Ramp list.  The shaman, chanter, shadowknight, monk classes have abilities that will fully remove them from combat even against raid mobs (verify other classes please.)  Items such as the Lingering Essence of Cazic Thule (http://everquest.allakhazam.com/db/item.html?item=112245) will mezz you and remove you from combat.  There are also Feign Death potions - Planar Overdose (http://everquest.allakhazam.com/db/item.html?item=108258) that can feign death you, while not wiping your aggro immediately, it will after 1 min like standard feign death. Please post/update with any other clickies and abilities that are standard fare to lose aggro now.

In FL we like to have warriors, shadowknights, and paladins on the ramp list first - not so much monks these days.  Warriors have the straight mitigation and defensive discs to survive. SKs and paladins have mitigation and defensive discs, while not as nice as the warrior set, increase the survivability. They also have the added bonus of spell, aa, and proc invulnerability. Every paladin and sk should work towards and have available to them the Divine Hammer of Consternation (http://everquest.allakhazam.com/db/item.html?item=12657) or the Corrupted Hammer of Consternation (http://everquest.allakhazam.com/db/item.html?item=123584

If you are called on to Ramp tank - liberally apply your defensive discs, as mobs these days do hit quite hard and often on their ramp hits, and at times will land 1-4 hits in a row.

Rampage damage trigger and on who - attached below - Created by Zaknaffein.  Gives a very basic breakdown of who is doing the hitting, who is being hit, and how much. Modify to your needs.

Now to examples as that helps people understand in many cases.

Lets say there are 10 people on a raid about to engage BigBadBoss00.  Lets call them... Overeasy(war), Furro(cler), Curmugly(wiz), Dimbly(dru), Bdallya(chanter), Toransa(sham), Gimamam(sk), Maglor(pal), Mistatk(war), Sanolan(bard).  BigBadBoss00 has the rampage ability.  MTO is laid out as Overeasy, Mistatk, and Ramp is set as Maglor, Gimamam. Maglor would trigger the mob with attack on to be sure that he is getting the first hit in on the mob. Gimamam would be very shortly after with any method of getting on the aggro list - dot, arrow, melee hit, something.  This would put the two of them as the first two on the ramp hate list, followed shortly by Overeasy since he is now picking up the mob to tank. Mistatk shoots it with an arrow as it gets picked up by OE.  Bdallya, Toransa, Dimbly all cast debuffs on the mob now that its moving, and Furro starts healing. They are the next four on the list. Sanolan did not have his ae songs going yet, but started attacking when the mob was in camp, so he is next. Curmugly waits like a good dps until assist is called and is subsequently last on the list. The immediate effect is that the Ramp list is populated as follows:

1. Maglor - Currently being hit by Ramp damage.
2. Gimamam
3. Overeasy - Currently tanking.
4. Mistatk
5. Bdallya
6. Toransa
7. Dimbly
8. Furro
9. Sanolan
10. Curmugly

Well, Maglor didn't get a heal on time on a bad ramp round + AE and died, And Gimamam wasn't quick enough on the defensive and got eaten by the next ramp round. They get rezzed and start attacking again. The list has now shifted to make Overeasy the top of the ramp list - but since he is currently the active tank - he will not be hit by ramp + tank damage, the ramp hits would shift to the next in line.

1. Overeasy - Currently tanking.
2. Mistatk - Currently being hit by Ramp damage.
3. Bdallya
4. Toransa
5. Dimbly
6. Furro
7. Sanolan
8. Curmugly
9. Gimamam
10. Maglor

If OE called a tank swap and Mist picked it up - their positions on ramp list would not shift at all, but now that Mist is tanking - OE would now take the ramp damage.

1. Overeasy - Currently being hit by Ramp damage.
2. Mistatk - Currently tanking.
3. Bdallya
4. Toransa
5. Dimbly
6. Furro
7. Sanolan
8. Curmugly
9. Gimamam
10. Maglor

At this point - Gimamam and Maglor will NOT have ramp again until the other 8 people on the list are dead, currently tanking, or mem wiped off the ramp list.
If Overeasy had to run out of range for an emote - the ramp hits would fall to Bdallya until OE moved back into mob range.

Simple example, but should illustrate.  For real raid purposes - expand this to 54 people.

Most times, debuffers/healers end up at the top of the list because of overzealousness, tank inaction, or tank death.

Rampage list is something fully controllable on mobs that do not memblur mid fight.  Every SK, paladin, and extra warrior should be prepared in every fight that has a Rampage mob to hit the mob early with an ability to get on the hate list near the top.

PLEASE ask questions. PLEASE post any info that is missing.


7
Shadow Knight / DPS considerations.
« on: November 30, 2015, 01:24:24 AM »
In an attempt to increase SK DPS on the whole, here is some things I use that may or may not come in handy for other folks:

I have 2 multibind keys - 1 and 2.

1 is tied to Bash, Vicious Bite of Chaos, Banestrike, Chattering Bones, and my lifetap/spear chain.
2 is tied to Bash, Lacerating Blade, Repel, and my clickies that do damage - 2 swarm pets, necromantic bone, and theft of hate bp.

For some reason Discs, clickies, and AAs seem to have a conflict chaining, so that's why the keys are built like that. 

1 is setup to fire in order: Bash, Banestrike(/alt activate 15073), Vicious Bite of Chaos(/alt activate 825), Chattering Bones(/alt activate 3822), Spear, Dichotomic Fang, Dire lifetap (highest level), Touch of lifetap (highest level), Touch of lifetap (5 levels lower), and Touch of lifetap (10 levels lower)
This will fire whatever is off cooldown - frontloaded for the most damage items first.  Spear being on the front of spell spam helps to also boost aggro as it is a good bump on that number while tanking.

2 is setup on the longer cooldown items that will not be used as often. Bash, Repel, Lacerating Blade (1ish minute cooldown), Amulet of the Drowned mariner (5min cooldown), Vicious Rabbit (5min cooldown), Necromantic Dragon Bone (3 minute cooldown), and finally Breastplate of Wailing Hatred (3 minute cooldown)

Bash is on both sets of hotkeys for the extra dps as well as being constantly pushed for when unholy guardian is up for the lifetap proc.

3 sets of burn hotkeys:
1 fires off unholy guardian then /stopdisc so the buff for the lifetap off bash comes up. and glyph of cataclysm.
2 fires off spell loaded burning so that dots and lifetaps hit for much higher damage.  This fires off Gift of the Quickspear(/alt activate 2034), unholy aura disc, Cotf T2 BP for proc, Visage of Decay(/alt activate 747), and First spire(/alt activate 1450).
3 fires off melee loaded burning. This fires off Visage of Death(/alt activate 9403), T`Vyl's resolve (/alt activate 742), Carmine Blade disc, Reflexive Rancor disc, Lacerating Blade disc.

Burn Hotkey 1 looks like:
line 1: /pause 2, /disc unholy guardian discipline rk. iii
line 2: /stopdisc
line 3: /alt activate 7019

Burn Hotkey 2 looks like:
line 1: /pause 2, /disc unholy aura discipline
line 2: /pause 3, /useitem 32 5
line 3: /alt activate 2034
line 4: /alt activate 1450
line 5: /alt activate 747

Burn Hotkey 3 looks like:
line 1: /pause 2, /alt activate 9403
line 2: /alt activate 742
line 3: /pause 2, /disc Carmine Blade rk. iii
line 4: /pause 4, /disc lacerating blade rk. iii
line 5: /disc reflexive rancor rk. iii

There are also other buttons not bound to those initial burn key dumps that get hit:
Reinforced Malaise (increases dot damage 100% at rank 5), 7th year vet reward aa - intensity of the resolute, the harmtouch/leech touch/thought leech keys, 4-5 swarm pets, and some dd clickies.  I also have and use the girdle of the weaponmaster, the +500 dmg to procs does add up.  There are also the ancient hedgewizard brews and the mana infusion potion that can add up on damage.

As of this post - harm touch was doing 337225 initial damage, and 7 ticks of 36226. leech touch with unholy aura running hit for 300k ish. and thought leech hit for 871000 on a crit with the secondary damage of 162500.

Burn spell setup is Spear of Vizat, Dichotomic Fang, Dire Declaration, Touch of Lutzen, Touch of Falsin, Touch of Urash, Plague of Holmein, Blood of Bonemaw, Dire Strangulation, Plague of Piqiorn, Blood of Ralstok, Plague of Klonda.

All of the dots and buffs have Gina trigs on wearing off to know recast or hit the next hotkey in the chain.

Depending on the raid setup - if there are many necros, I drop the dots and go primarily with the lifetap chaining.

Starting the fight/burn, general order is to put a couple dots on the mob when engaging in melee, hit burn hotkey 1, do a quick check that unholy guardian did /stopdisc properly, then hit burn hotkey 2, reinforced malaise, and start pounding the 1 and 2 buttons to spam out the bashes and multibinds, redotting as needed.

Visage of decay and reinforce malaise with buff extensions last for 1m46s ish. first spire will only last 1m34s ish, so it will wear off before the spell burn is really over - when first spire wears off, i hit intensity of the resolute so that it is running through the end of spell burn, and is still up for when the melee burn key is hit.

When visage of decay drops, hit epic for the accuracy increase and hit burn hotkey 3.  continue spamming dots/lifetaps while meleeing with the increase damage from Visage of decay.

Continue through the end of the fight with spell spamming until oom or the mob is dead.

8
Shadow Knight / pretty pretty UI!
« on: November 29, 2015, 11:17:57 PM »
Curious what other folks UI looks like. Just kind of a jumble of stuff. All channels/tells go to the window on the right. Main is for group/raid/guild. Info is for all the other stuff (randoms/other/disc ending/spell failures). Chat 4 is the dump of all the other parser shit no one wants to see.

ETW, Buffs, Songs, Target, Potion, EQ button, Tribute, and Combat abilities windows resized via XML for my own use.

Pages: [1]